Pole barns, by nature, offer a versatile canvas for any handyman or homeowner looking to tailor their outdoor space to fit their lifestyle. These sturdy structures, known for their functional design and durable construction, are prime candidates for enhancements that merge practicality with anything you can think of. Focusing on pole barns means considering their unique architectural elements — those broad, often unadorned sides, the structural poles that give these buildings their name, and the expansive spaces they often encompass.
We’re zoning in on three affordable and purposeful upgrades that cater to different desires and functionalities while keeping in mind the specific context of pole barn structures. Without further ado, let’s get them built!
Table of Contents
A Green Open Space for a Small Golf Terrain
Let’s get our hands dirty and transform your pole barn’s exterior with a slice of green – we’re talking about setting up your own putting green right in the backyard. It’s about crafting a unique outdoor space where you can unwind or entertain, all while giving your pole barn a standout feature. Here’s how to hammer this idea into reality, step by step.

Laying the Groundwork
Prep the land. This means clearing out any rocks, sticks, and whatever else is cluttering up the place. You want a level playing field, literally. This step is crucial because a smooth, even surface underfoot is what makes a golf terrain playable and enjoyable.
Going Natural
Natural is best for aesthetics and functionality. For that lush, inviting look, roll out some high-quality turf for your greens. This isn’t just about looks; it’s about creating a surface that feels good underfoot and plays well. Then, carve out pathways with gravel for that rustic charm, guiding players through your course with ease. Dot the landscape with some shrubs – not too many, just enough to bring a touch of greenery and maybe add a strategic obstacle or two.
Spice It Up
No great mini golf course is complete without a few surprises. Consider adding a water feature or a sand trap here and there. These aren’t just for show; they’re there to challenge your players and make each round interesting. And let’s not forget about pole barn lighting — strategic lights not only mean you can enjoy the space after sunset, but they also add a whole new dimension to the ambiance of your golf terrain.
Handy Tips for the DIY Handyman:
Let’s walk through the steps to ensure your mini golf course is not just built but built to impress and endure.
- Space is Key:
Whip out that tape measure and ensure you have enough room to bring this vision to life. You want your mini golf course to feel open and inviting, not cramped.
- Choose Low-Maintenance:
Opt for landscaping options that won’t have you out there every weekend with a mower or trimmer. You want to spend your time playing, not pruning. This approach to crafting a unique outdoor space not only enhances the appeal of your pole barn but also creates a personal retreat or a focal point for gatherings.
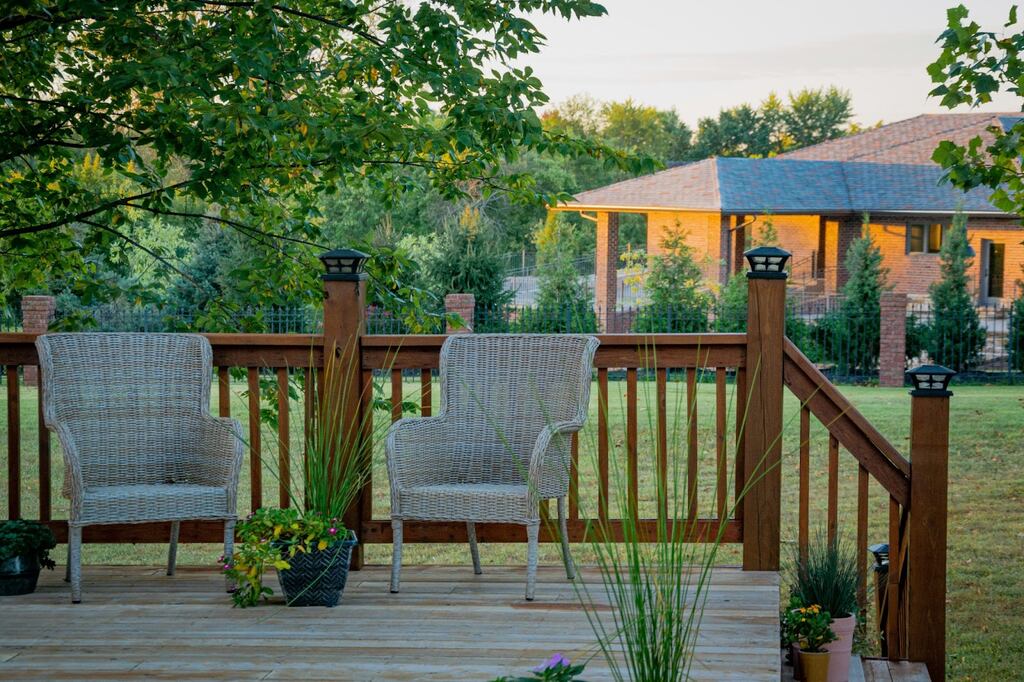
Crafting Your Pole Barn Patio
Building a patio next to your pole barn transforms it from just a structure in your backyard to the heart of outdoor living. Here’s how to get it done right, with a mix of hands-on advice and a touch of elbow grease.
Start with Solid Planning
First things first, you gotta measure out your space. It’s not just about fitting a table and a couple of chairs; think about the whole scene — grill, fire pit, maybe even a space for your dog to lounge. Once you’ve got your measurements, it’s time to pick your materials. Concrete pavers or concrete slabs are top-notch choices for that rugged, durable look that complements your pole barn perfectly.
Lay the Groundwork
Clearing the area comes next. Get rid of any grass, stones, or other bits and pieces lying around. A clean slate means a smooth start. Now, leveling the ground might not be the most exciting part of the job, but take it from us; it’s crucial. An even surface means no pesky water pools and stable furniture setups.
Receive Quotes from Multiple Barndominium Builders & Kit Providers Near You Today (It's Free!)
Fill in this 1-minute form below and receive estimates for your project without having to find them yourself! Let them do the work.
The Foundation is Key
For pavers, you’re looking at a base layer of gravel topped with sand. This combo is the secret sauce for drainage and stability. If you’re pouring concrete, set up your forms now. It’s like drawing the outline before filling in the colors.
Bringing the Patio to Life
If you’ve gone the paver route, lay them out carefully from one corner, keeping them level and leaving just enough gap for sand. It’s like putting together a puzzle. For the concrete crowd, mix and pour carefully, smoothing things over with a trowel. And if you want that stamped look, now’s the time to make your mark.
Finishing with Flair
Fill the gaps between pavers with sand to lock everything in place. Seal your work, be it paver or concrete, to fend off the weather and wear.
A Few Handyman Hints:
Here’s how to get your patio off the ground, literally and figuratively, with some seasoned advice to steer you clear of common pitfalls.
- Weather Watch:
A project like this demands a clear day—or, better yet, a clear week. Wet concrete doesn’t set right, and paver sand doesn’t like to settle in the rain. Choose your timing wisely to keep the elements on your side.
- Tool Talk:
Building a pole barn patio requires precision and precision requires tools that won’t let you down. A good mallet and trowel are just as crucial for setting pavers and smoothing concrete. Cutting corners on tools is like building on sand — eventually, things will shift, and not in your favor.
- Permit Patrol:
A quick call or visit to your local building authority can clear up any permit requirements. It might seem like just another hoop to jump through, but securing the right permits upfront can save you from major headaches down the line — think fines, or worse, having to tear down your hard work.
What you’re building here extends beyond the physical structure of a patio. You’re creating an extension of your living space, an outdoor haven that complements your pole barn and beckons for those moments of leisure and gatherings.
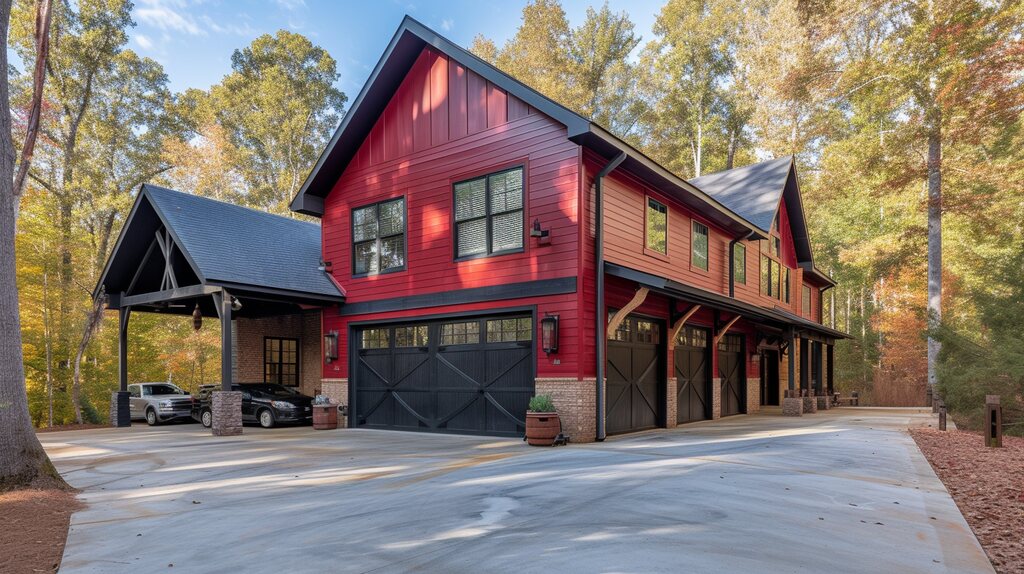
Neatly Built Carport in Pole Barn Backyard
This one isn’t just about throwing up a shelter for your car; it’s about crafting a structure that’s both functional and a tip-top match for your pole barn’s charm. Here’s the down-to-earth way to make it happen, with a blend of straightforward advice and those key details that make all the difference.

Mapping It Out
Size up the space where your carport will live. You’re playing a real-life game of Tetris here, figuring out how to best fit your carport in the available space without it feeling like an afterthought. Measure twice, cut once, as the saying goes. And remember, the size of your vehicles ain’t just a detail — it’s central to planning the dimensions of your carport.
Selecting Your Materials
The bones of your carport — be it wood or metal beams — need to be tough as nails. You’re looking for materials that not only catch the eye and complement your pole barn but can also laugh in the face of whatever weather comes their way. And when we talk about anchoring, we mean properly secured anchors, as your carport will stand its ground against the windiest days.
Installation with Precision
You want your carport to look like it was always meant to be there, with clean lines and a smooth transition to your existing structures. Think about the water — adding gutters and downspouts isn’t just about keeping your head dry; it’s about protecting your investment from water damage.
Pro Tips:
Here are some pro tips for a successful build to guide you through, ensuring your project not only meets expectations but exceeds them.
- Know the Rules:
It’s easier to align your project with regulations from the start than to face the hassle of adjustments or, worse, redoing parts of your carport later on. This initial step can save you from headaches and keep your project on track.
- Consider Your Skills:
If you’re not entirely comfortable with the idea of DIY, there’s no shame in seeking help. Hiring a professional contractor can lift a huge weight off your shoulders, guaranteeing that your carport is not only up to code but also built with durability and safety in mind.
And that’s it! Armed with these tips, transforming the exterior of your pole barn into a personalized retreat or functional space is well within reach. Now, grab your tools and let the transformation begin.