For new homeowners looking for unique and alternative ways to build their dream homes, barndominiums have been a popular choice for quite some time. A barndominium is a house built from a metal frame or a post-frame building. On the exterior, they look like warehouses and barns, but inside, they can have all the amenities of a modern home. For this particular guide, we will talk about framing the interior of a barndominium with a wooden frame (post-frame).
Building a barndominium generally costs less than building a custom traditional stick-built home. This is mostly true when you buy a prefabricated barndominium kit and do the construction work yourself. If you have the skills and the time to take the project into your own hands, going the DIY route would be your best bet in lowering the cost of building your barndo. If you decide to go DIY like Coty in Tennessee did, you might find the information in this article useful.
This guide aims to help you with framing the interior of your post-frame barndominium—a crucial step in building your barndo that involves much work. However, you will find that it is not a complicated process.
Table of Contents
- 1 How Long Does It Take to Frame a Barndominium?
- 2 How Much Does It Cost to Frame the Inside of a Barndominium?
- 3 How Do You Frame a Barndominium?
- 3.1 1. Prep the Foundation
- 3.2 2. Erect the Perimeter Walls
- 3.3 3. Put Up the Trusses
- 3.4 4. Install the Roof Sheathing
- 3.5 5. Frame the Windows and Doors
- 3.6 6. Install the Wall Sheathing
- 3.7 7. Install the Metal Roof
- 3.8 8. Concrete Floors, Exterior Sidings, Window, and Door Openings
- 3.9 9. Apply Insulation
- 3.10 10. Interior Framing
- 3.11 11. Installing Partition Walls
- 3.12 12. Framing the Ceilings
- 3.13 13. Adding Drywall
- 4 What to Know Before You Frame a Barndominium?
- 5 Final Thoughts
How Long Does It Take to Frame a Barndominium?
The time it takes to frame a barndominium can vary due to many things, which you can read more about in our comprehensive barndominium guide. This heavily depends on factors such as the size of your floor plan, the complexity of the design, the type of insulation, and the plumbing and electrical specs. Generally speaking, framing a barndominium can take a few weeks up to a month if all materials are readily available.
How Much Does It Cost to Frame the Inside of a Barndominium?
Like the time it takes to frame a barndo, the cost of framing a barndominium also greatly depends on several factors like the location, the design complexity, the floor plan, and the biggest factor of all, the size of the barndo. To give you an idea of how expenses would look, a 54′ x 48′ x 9′ barndominium costs $10,663.57 in interior framing (video below). This does not include the spray foam insulation.
How Do You Frame a Barndominium?
Framing is one of the most crucial steps in building your post-frame barndominium. If you do not have a background in any type of construction project, framing might sound like an intimidating task. Let me tell you now that it’s not. Although this step is not too complex, it is essential that you have a good understanding of the process as you plan your build. This guide will walk you through the steps in framing the interior of a post-frame barndominium home.
1. Prep the Foundation
There are several foundation options for post-frame buildings. However, full concrete foundations such as the Perma-Column brackets are recommended, so you don’t have to worry about foundation post-rot. At this point, your posts should be cut and ready to be bolted to the foundation.
2. Erect the Perimeter Walls
Now that the foundation is ready and the timber is cut up, it is time to erect the exterior frames. One of the best ways to do this is by connecting multiple posts with standard 2×4 girts and then standing the frames up to 5 posts at a time with the help of a telehandler or a crane. Bolt the posts to the foundation brackets and do the same to the next set of posts. Connect the exterior girts of one set of posts to another until all the exterior frames are erected.
3. Put Up the Trusses
Before you start raising the trusses, it will be easier to mark where the purlins are going to be fastened. Depending on the structural design, 2×4 18-foot purlins can be spaced every 2 feet on the trusses. Pre-drilling a hole in the purlins where the trusses will be is also a good idea. This will ensure the wood isn’t split by the 60-penny nails when nailed to the truss. This also makes fastening easier.
With all the trusses and purlins ready to go, you can now begin raising the trusses with the help of a telehandler or a crane. Trusses sit on top of the posts and are secured with nails. Nail the pre-marked purlins onto the trusses and do this until all the trusses and purlins are installed.
Receive Quotes from Multiple Barndominium Builders & Kit Providers Near You Today (It's Free!)
Fill in this 1-minute form below and receive estimates for your project without having to find them yourself! Let them do the work.
4. Install the Roof Sheathing
With the trusses and purlins in place, you can start installing the roof sheathing. Nail the sheathing on the purlins across the entire roof. You can then apply adhesive tape to seal the seams.
5. Frame the Windows and Doors
Build out the window and door jams that will be the opening of the window and doors. Install a header on the exterior frame. This is where the top of the window and door box will be secured. You can start fastening the window and door boxes on the wall frame when they’re ready.
After the window boxes are secured, you can cut out the girts that run across the window box. Do the same for the door jams. You will then be left with the window and door openings on your exterior wall frame.
6. Install the Wall Sheathing
With all that out of the way, you can now start installing the wall sheathing. The goal is to cover the entire walls and then seal tape the seams to make them water-tight and air-tight. You don’t have to worry about covering the window frames at this point, as they will be cut out later.
7. Install the Metal Roof
After the wall sheathing is installed, you will proceed to install the soffits and fascia. You will then be left with a fully sheathed frame. At this point, you can now install the metal roof. Before installing the metal panels, you must install the eave trims on top of the fascia. This is what the panels are going to hold on to.
8. Concrete Floors, Exterior Sidings, Window, and Door Openings
At this point in the build, details like plumbing and floor heating systems would already be in place, as well as the splash planks and exterior sidings. You can also cut out the openings for the windows and doors. We don’t need to get into detail with these steps as they are not part of framing. When all those are taken care of, you can pour concrete on the floors.
9. Apply Insulation
It is now time to apply insulation. Closed-cell spray foam insulation is often used because it is easy to install and provides great airtight insulation. You can ask barndo owners from our Facebook Group about their experience with different types of insulation. They often share valuable information with folks on their barndominium journey.
10. Interior Framing
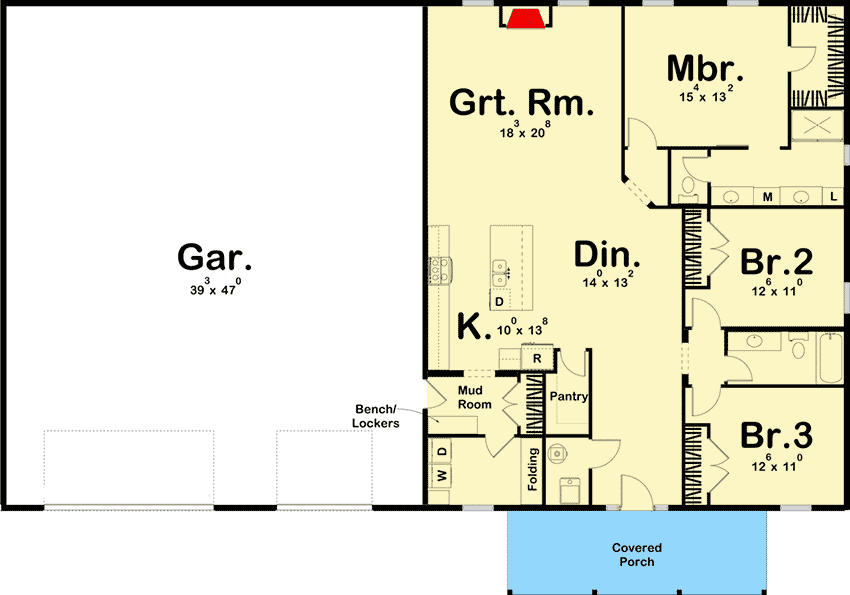
Before framing the interior, you must ensure your floor plan has been finalized. The fun thing about barndominiums is that you can do many things with it. Without the need for load-bearing walls, you are left with an open space with the creative freedom to design. You can be more flexible on how much space you can designate for the living room or the kitchen. You can turn the whole first floor into a garage. It’s all up to you. Just make sure everything is planned before you proceed to the next steps. If you need help with customizing your plan, we can do it for you.
Framing the interior is pretty similar to the exterior, where you take girt boards and fasten them horizontally to the posts. For multiple-story builds, you would need to put up the headers or beams at the ceiling height for where the joists will sit.
11. Installing Partition Walls
Now, you can proceed to build the frames of the partition walls. A frame is basically a rectangle built with four 2x4s and evenly spaced vertical studs. Its dimensions should be the dimensions of the wall. The height of a wall’s frame should be the exact planned height of the ceiling. Here’s a tip; build the frames flat on the floor to ensure they are leveled vertically. You can then lift them into place and secure them into the concrete floor. For multiple-story builds, you can put the joists on top of the wall frames and secure them. You can then begin installing the flooring on the joists.
12. Framing the Ceilings
The next step is to fasten the ceiling joists connecting the trusses. This will add rigidity and strength to the overhead frame. For multiple-story builds, you can begin putting up walls for the second story after the ceilings are framed out.
13. Adding Drywall
At this point, insulation, framing, electrical, and plumbing work should be completed. By then, it is time to put up the drywall. When installing the drywall, start with the walls. They typically come in 4×8 sheets and are ideally installed horizontally.
Higher ceilings may require multiple sheets to cover the height of the wall. It might also be a good idea to leave a gap, about half an inch, above the floor. This gives room to the flooring. After that is done, congratulations! The interior is almost complete. You can start painting the walls and ceilings.
What to Know Before You Frame a Barndominium?
To minimize making expensive mistakes, here are some things to know before framing your barndo. Make sure the floor plan is finalized. Last-minute changes can cost you time and money, having to rip out frames that are already fastened.
Another thing, now that you have a general idea of the process of framing a barndo, you probably understand that it takes a level of skill and a background in building to get ideal results. If you are not confident about doing the steps alone, consider hiring a contractor to help you. You can also hire them for specific tasks you think you need help with. That’s what Chris and Brandi did when they were building their own barndo. It is always worth spending more to ensure you get a finished product you will be happy with.
Final Thoughts
Framing a barndominium’s exterior and interior is not rocket science, but it requires proper planning and a background in DIY building. Although it may be important for you to cut costs by doing things on your own, it is also essential to make sure the barndo turns out as it should. The decision to outsource the job is yours to make. We hope that this guide has helped you visualize the process of framing a barndo. While you are in the planning phase of your barndo project, make sure you check out and follow our Pinterest and Facebook pages, where you can browse around for barndo ideas that will pop into your feed from time to time.